Someone might need to install Windows 10 from a USB drive because it offers a faster and more convenient installation process compared to using optical discs. USB drives are essential for modern laptops and desktops that no longer include DVD drives. Additionally, installing Windows from a USB drive is helpful when updating or repairing the operating system, as it allows for quick and portable access to the installation files.
Installing Windows 10 from a USB drive is faster and more convenient. USB drives are portable, reusable, and compatible with modern computers that lack optical drives. They also provide reliable installations and are easy to create using tools like the Windows Media Creation Tool or Rufus.
Table of contents
What You’ll Need to install window 10
- USB Drive: At least 8GB capacity.
- Windows ISO File: Download from the official Microsoft website.
- Bootable USB Creation Tool: Use either the Windows Media Creation Tool or Rufus.
- Computer with Internet Access: For downloading files and tools.
- Product Key: A valid Windows product key for activation (if required).
Download and Install a Tool to Create a Bootable USB
Windows Media Creation Tool for install window 10
- Download: Go to the Microsoft website and download the Windows Media Creation Tool for install window 10.
- Install and Run: Open the downloaded file and follow the on-screen instructions to install and run the tool.
- Create Installation Media: Select “Create installation media (USB flash drive, DVD, or ISO file) for another PC” and click “Next”.
- Select USB Drive: Choose the language, edition, and architecture. Select “USB flash drive” and choose your USB drive from the list.
- Create USB: Click “Next” and let the tool create the bootable USB drive.
Rufus tool for install window 10
- Download: Go to the Rufus website and download the latest version of Rufus.
- Run Rufus: Open the downloaded Rufus executable file. No installation is required as Rufus is a portable application.
- Select USB Drive: In Rufus, select your USB drive from the “Device” dropdown menu.
- Select ISO File: Click “SELECT” and browse for the Windows ISO file you downloaded.
- Configure Settings:
- Partition Scheme: Choose MBR for BIOS or UEFI-CSM, or GPT for UEFI.
- File System: Typically, use NTFS.
- Start Creation: Click “Start” and wait for Rufus to create the bootable USB drive.
Setting Up the Computer to Boot from USB
- Insert the USB Drive: Plug the bootable USB drive into your computer.
- Access BIOS/UEFI Settings: Restart your computer and press the appropriate key (such as F2, F12, Delete, or Esc) to enter the BIOS/UEFI settings.
- Change Boot Order: In the BIOS/UEFI menu, navigate to the boot settings. Set the USB drive as the first boot device.
- Save and Exit: Save the changes and exit the BIOS/UEFI settings. Your computer will restart and boot from the USB drive.
Now be focus and follow these steps for install Windows 10
Follow these steps to install Window 10 safely and efficiently. Avoid mistakes and ensure a smooth installation, protecting your computer from potential issues.
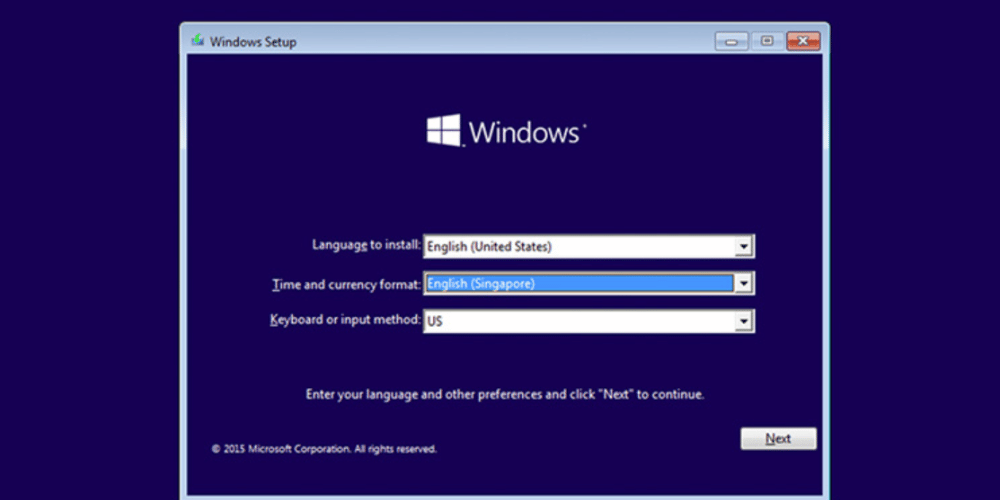
- Start the Installation Process: After booting from the USB drive, the Windows Setup window appears.
- Follow the On-Screen Instructions: Choose your language, time, and keyboard preferences. Click “Install Now“.
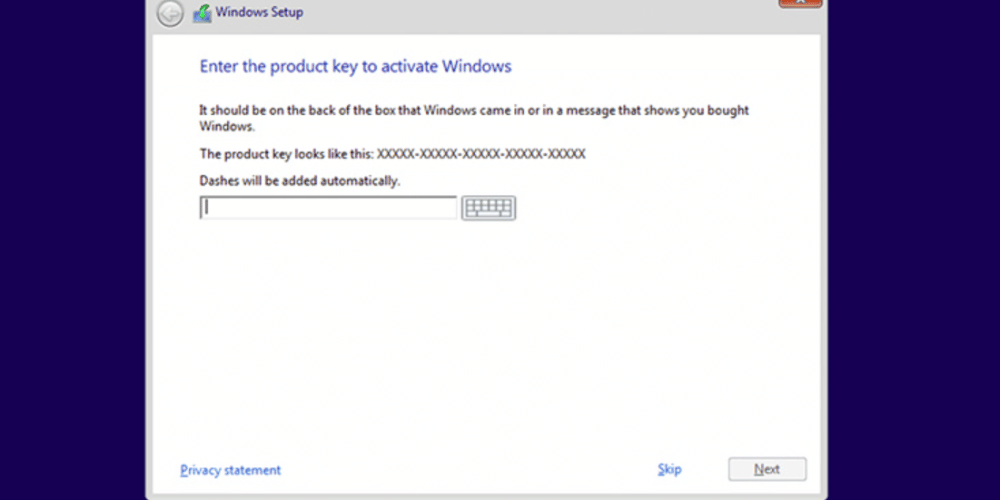
- Enter Product Key: If prompted, enter your product key. Alternatively, skip this step if you don’t have one.
- Select Windows Edition: Choose the edition of Windows you want to install and accept the license terms.
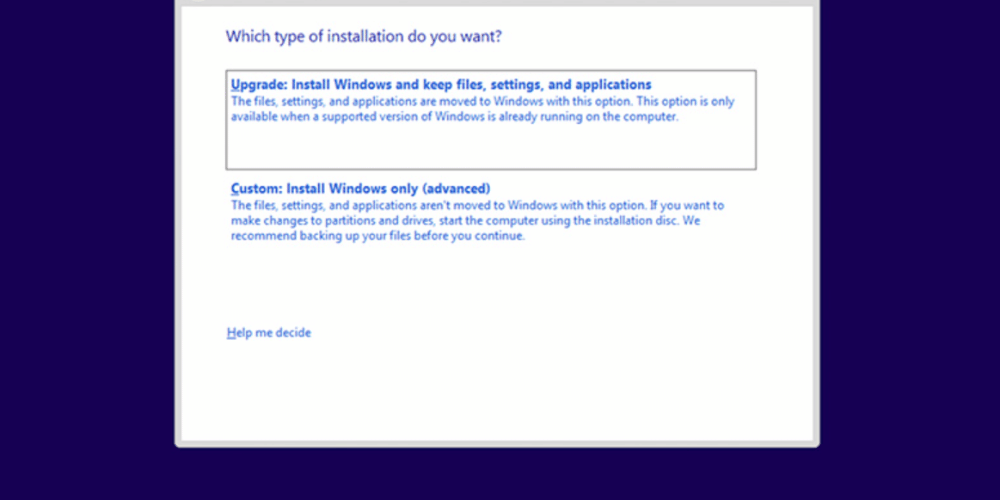
- Custom Installation: Select “Custom: Install Windows only (advanced)”**.
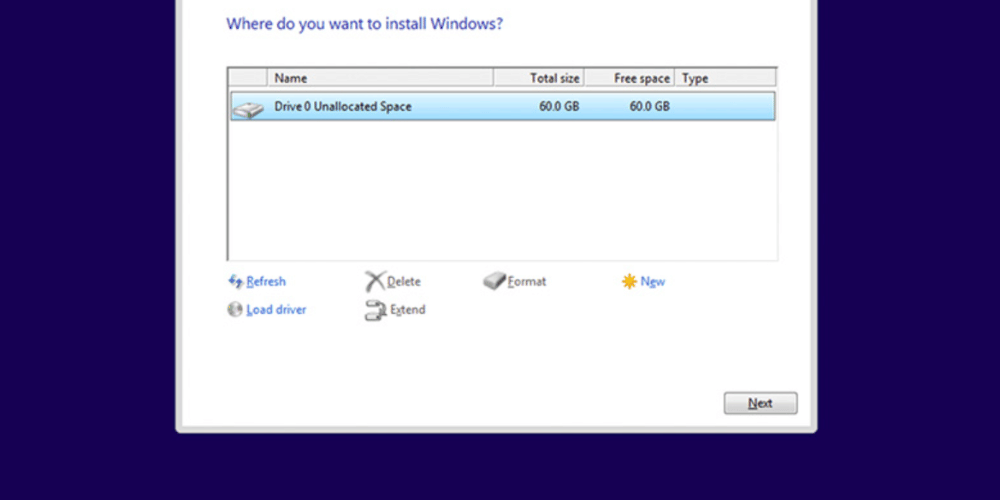
- Choose Installation Location: Select the partition where you want to install Windows or create a new one if needed.
- Begin Installation: Proceed with the installation process and wait for it to complete. Your computer may restart several times during this process.
**Custom Installation
- Select “Custom: Install Windows Only (Advanced)”: This option allows you to customize your installation settings.
- Choose Installation Location: Select the partition where you want to install Windows. You can also create, delete, or format partitions as needed.
- Partition Options:
- Create New Partition: Allocate space on your hard drive for Windows installation.
- Delete Partition: Remove existing partitions to free up space.
- Format Partition: Prepare the partition for Windows installation by formatting it.
- Select Partition: Choose the partition where you want to install Windows and click “Next” to begin the installation process.
Post-Installation Setup
- Personalize Windows: Set up your preferences for language, region, keyboard layout, and user account.
- Connect to Network: Connect your computer to a Wi-Fi network or Ethernet connection to access the internet.
- Windows Updates: Check for and install any available Windows updates to ensure your system is up-to-date.
- Install Drivers: Install necessary drivers for your hardware components such as graphics, sound, and network adapters. You can usually find these drivers on the manufacturer’s website.
- Activate Windows: If you haven’t already entered a product key during installation, you’ll need to activate Windows now. Go to Settings > Update & Security > Activation and follow the prompts to activate your copy of Windows.
- Configure Settings: Customize your desktop background, theme, and other personalization options according to your preferences.
- Install Applications: Install any additional software or applications you need for your computer, such as web browsers, productivity tools, and antivirus software.
- Create System Restore Point: Set up a system restore point to easily revert your system to a previous state if needed in the future.
- Backup: Make sure to back up your important files and data regularly to prevent data loss in case of system failures or errors.
Troubleshooting Common Issues while install window 10
USB Drive Not Recognized
- Cause: Incorrect formatting or compatibility issues with the USB port.
- Solution:
- Reformat the USB drive to FAT32 or NTFS.
- Try using a different USB port or a different USB drive.
Unable to Boot from USB
- Cause: Incorrect BIOS/UEFI settings or USB drive not set as the primary boot device.
- Solution:
- Enter BIOS/UEFI settings and set the USB drive as the first boot device.
- Ensure USB booting is enabled in BIOS/UEFI settings.
Installation Errors
- Cause: Corrupted ISO file, faulty USB drive, or insufficient disk space.
- Solution:
- Redownload the Windows ISO file from the official Microsoft website.
- Create a new bootable USB drive using a different tool.
- Ensure there is enough disk space on the target drive for the Windows installation.
Product Key Not Accepted
- Cause: Incorrect or invalid product key.
- Solution:
- Double-check the product key for accuracy.
- Ensure the product key matches the version and edition of Windows being installed.
Post-Installation Issues
- Cause: Missing drivers or incompatible hardware.
- Solution:
- Install necessary drivers for hardware components from the manufacturer’s website.
- Check for Windows updates and install any available updates to address compatibility issues.
For Additional Assistance
- If you encounter persistent issues while install window 10, refer to It Help Desk or seek assistance from Hire It Expert.
Conclusion
Installing Windows from a USB drive offers a convenient and efficient way to set up or upgrade your operating system. Follow the step-by-step instructions in this guide to successfully install Windows 10 and customize your system to meet your needs. Whether you’re performing a fresh installation or an upgrade, you can install Windows 10 easily and efficiently.
Remember to:
- Prepare your USB drive and Windows ISO file beforehand.
- Set up your computer to boot from the USB drive in BIOS/UEFI settings.
- Follow the on-screen instructions during installation, customizing settings as needed.
- Complete post-installation setup, including activating Windows, installing drivers, and updating your system.
Installing Windows 10 from a USB drive is a straightforward process, but it’s crucial to proceed with caution. Even a small mistake while you install Windows 10 can have serious consequences and potentially render your computer inoperable.
If you’re unsure about any step or encounter unexpected errors, don’t hesitate to seek assistance from It Help Desk.
If you encounter any issues during the installation process, refer to the troubleshooting tips provided in this guide or seek assistance from Hire It Expert.
By following these steps, you’ll install Windows 10 and have a fresh installation of Windows up and running smoothly on your computer in no time. Enjoy your newly installed operating system!