Let’s Ready for Windows 11 Installation
Ready to upgrade your computer with Microsoft’s latest OS? We’ll walk you through installing Windows 11, which is simple. This comprehensive guide will make Windows installation easy, whether you’re upgrading or starting from scratch.
Step 1: Check System Requirements
Before diving into the installation process, it’s crucial to ensure that your system meets the minimum requirements for Windows 11. These include a compatible processor, sufficient RAM, and adequate storage space. Visit the official Microsoft website to verify if your device is compatible.
Step 2: Backup Your Data
Although the installation process typically goes smoothly, it’s always wise to backup your important files and documents before proceeding. You can use an external hard drive, cloud storage, or a reliable backup software to safeguard your data.
Step 3: Download Windows 11 Installation Media
To begin the installation process, you’ll need to download the Windows 11 installation media from the official Microsoft website. You can choose to create a bootable USB drive or download an ISO file, depending on your preference.
Step 4: Boot from Installation Media
Insert the bootable USB drive or mount the ISO file, then restart your computer. During the startup process, access the boot menu (usually by pressing F12 or ESC) and select the installation media as the boot device. This will initiate the Windows 11 installation process.
Step 5: Begin Installation
Once the installation media loads, you’ll be prompted to select your language, time, currency, and keyboard preferences. After configuring these settings, click “Next” to proceed.
Step 6: Enter Product Key
If you’re installing Windows 11 on a new device, you’ll need to enter a valid product key. If you’re upgrading from Windows 10, you may not need to enter a product key, as Windows 11 may automatically activate based on your existing license.
Step 7: Accept License Terms
Carefully read and accept the license terms to continue with the installation process. Be sure to review the terms and conditions before proceeding.
Step 8: Choose Installation Type
You’ll be prompted to choose between an upgrade or custom installation. Select “Custom: Install Windows only (advanced)” if you’re performing a clean installation on a new device or want to format the existing drive.
Step 9: Select Drive and Begin Installation
Choose the drive where you want to install Windows 11 and click “Next” to start the installation process. Windows will copy files, install features, and update settings during this phase. The installation time may vary depending on your system’s hardware specifications.
Step 10: Complete Installation
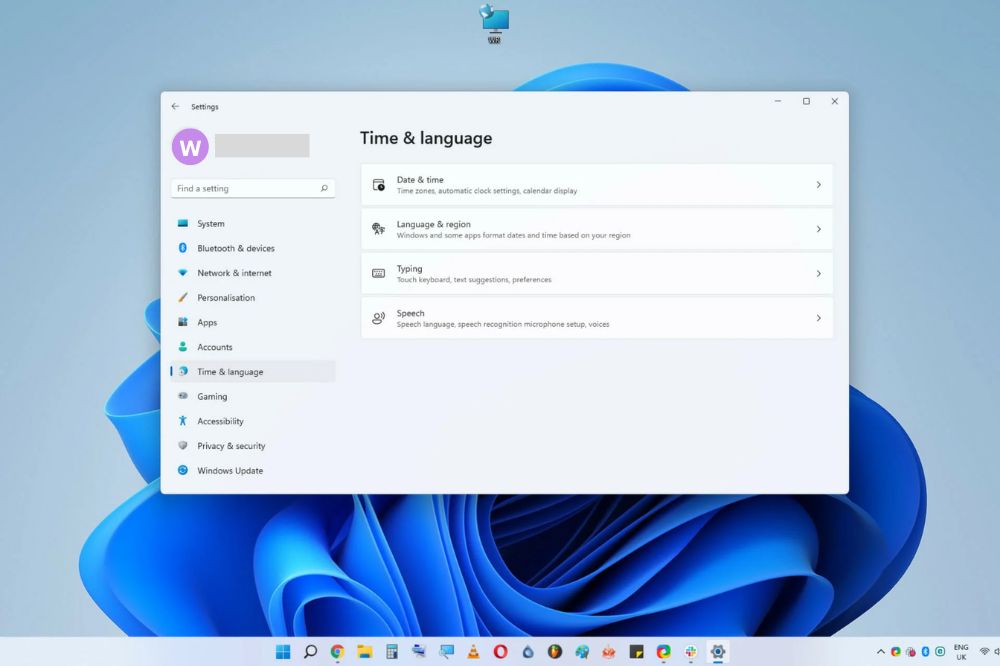
Once the installation process is complete, your computer will restart, and you’ll be greeted with the Windows 11 setup screen. Follow the on-screen instructions to personalize your settings, create user accounts, and configure preferences.
download and install Windows 11 on your PC All Steps
Despite Windows 11 being available for some time, Microsoft continues to offer it as a free upgrade for Windows 10 users, boasting numerous enhancements. If you’re unsure about how to Download Windows 11, we’ve got you covered.
There are five primary methods to download and Install Windows 11. Optimal is the hassle-free Windows Update on your PC. Alternatively, use the Installation Assistant or join the Windows Insider Program for an early experience without data loss. For a clean install, consider the media creation tool or using a Windows 11 ISO file – though note that these methods may result in data loss.
It’s crucial to check if your system meets the requirements for Windows 11. While adjustments are possible, it may impact Microsoft updates. Use the PC Health Check app to confirm compatibility before proceeding.
How to Upgrade to Windows 11 via Windows Update
The easiest way to install Windows 11 is through Windows Update. Here’s a step-by-step guide to help you seamlessly upgrade, without losing any data:
- Step 1: Go to Settings > Update & Security and click on Check for updates.
- Step 2: Look for the prompt stating “Upgrade to Windows 11 is ready, and it’s free.” Click the blue Download and install button and agree to the terms by selecting Accept and install.
- Step 3: Under Windows Update, you’ll see the Upgrade to Windows 11 with a download percentage. Allow the download to complete.
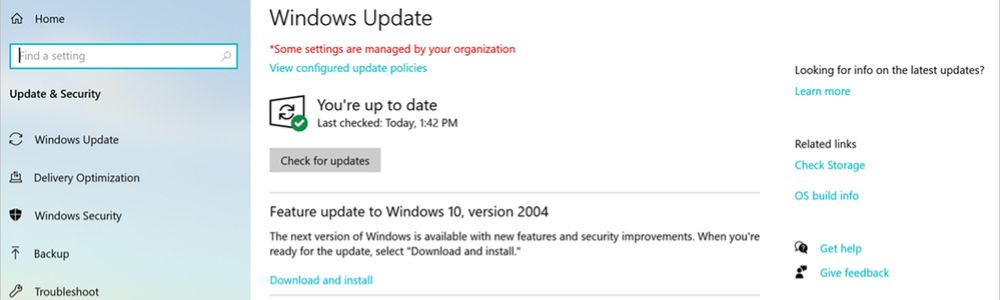
- Step 4: Once finished, a prompt will appear to restart your PC. Opt for the Restart now option. Your PC will undergo multiple restarts as Windows 11 installs. Upon completion, you’ll find yourself on the Windows 11 desktop! Enjoy the upgraded experience.
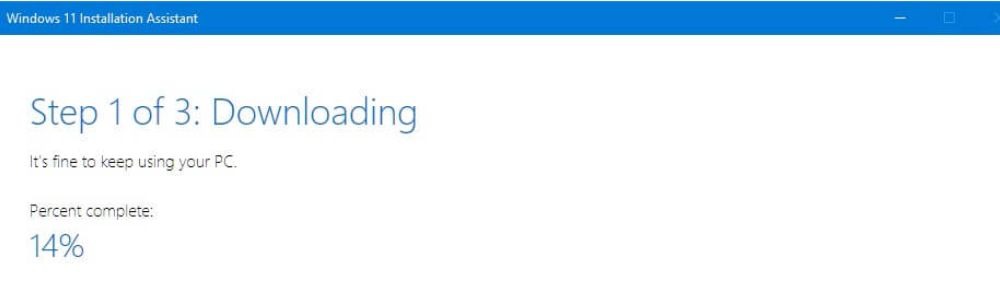
How to Upgrade to Windows 11 using the Installation Assistant
If Windows 11 isn’t appearing in your Windows Update, the Windows 11 Installation Assistant offers a manual upgrade from Windows 10 to the new OS. Follow these steps to ensure a smooth transition without losing any files:
- Step 1: Visit Microsoft’s Windows 11 download website and click on the Windows 11 Installation Assistant option at the top. Download the tool by clicking the blue Download now button.
- Step 2: Once the tool is downloaded, launch it and click Yes when prompted.
- Step 3: Choose Accept and install in the pop-up box. The process will unfold in three steps. Allow Windows 11 to download in the first step, which might take some time based on your connection speed. You may need to agree to Microsoft’s terms and services.
- Step 4: In the second step, Windows 11 will verify the integrity of your download, taking a few seconds.
- Step 5: The third step involves a prompt about Windows 11 installing in the background. Let it install and be patient, as it may take up to 30 minutes, depending on your PC’s speed.
- Step 6: After the third phase, click Restart now. Expect to be signed out, and your PC will restart, installing Windows 11. This process might take up to an hour based on your PC’s speed and specifications.
- Step 7: While Windows 11 is installing, you’ll see ‘Working on updates’ on your screen with a progress percentage. Your PC will restart several times. Once complete, you’ll be directed to the sign-in page and then the Windows 11 desktop. Enjoy your upgraded experience.

Install Windows 11 through the Windows Insider Program
If the previous installation methods aren’t suitable, installing Windows 11 via the Windows Insider Program is an alternative, though it involves preview versions of the OS and is considered a last-resort effort.
- Step 1: Navigate to Settings > Update & Security > Windows Insider Program and link your Microsoft Account. For first-time users, the program offers multiple channels: Dev, Beta, and Release Preview. Currently, Windows 11 is available in the Beta and Dev channels. Choose the one that suits your preferences.
- Step 2: The Beta channel provides a more stable Windows 11 experience with fewer bugs, though releases are less frequent. If you prefer the latest features and don’t mind potential issues, the Dev channel offers weekly releases.
- Step 3: Confirm your channel choice and sign in with your Microsoft Account. Your PC will restart.
- Step 4: After the restart, go to Settings > Update & Security, check for updates, and you should see Windows 11 listed. Select Download and install, then wait for the OS to install on your device. Embrace the latest Windows 11 features with this Insider Program installation!
Install Windows 11 With windows installation media
Clean installing Windows 11 using Installation Media involves creating a bootable USB drive. This method erases all files, so use caution. To proceed, follow the steps below:
- Step 1: Visit the Windows 11 Download Page and select Create Windows 11 Installation Media. Agree to the terms, choose Accept, and run the Setup tool. Opt for the recommended options for your PC, click Next, and select USB flash drive.
- Step 2: Choose your USB flash drive from the list and click Next. Windows 11 will download to the drive, and the installer will switch to Creating Install Windows 11 media. Once finished, you’ll receive a prompt that the drive is ready.
- Step 3: Close the installer with the Finish button, keeping the USB drive connected.
- Step 4: In the Windows 10 settings app, go to Update & Security, then Recovery. Under Advanced startup, choose Restart now.
- Step 5: In the pop-up, choose Use a device. Your USB drive should be listed. Choose it, and Windows will restart to your USB drive and the Windows 11 installer. If not, access your BIOS or UEFI to manually boot from the USB drive, often by pressing F12 on boot.
- Step 7: Opt for the Custom option, select the drive for Windows 11 installation, and click Next. You might need to click the Format button to erase all files. Once done, select the drive again and click Next.
- Step 8: Windows 11 will install, and you can relax. After installation, you’ll be guided through the out-of-box experience, prompting you to set up your PC again.
Conclusion
Congratulations on successfully installing Windows 11 on your computer! However, if you encounter any issues during the installation process or if the above solution does not work for you, don’t worry. Our team of dedicated IT professionals is here to help. Feel free to contact Hire IT Expert Computer Professionals for expert assistance and troubleshooting. We’re committed to ensuring that your Windows 11 installation experience is smooth and hassle-free. Enjoy your new operating system!